|
Rear Brakes
Usually
the rear brakes can last nearly a car's lifetime. The brake pads
nearly don't wear out. The usual problems with the rear brakes are
caused by defective slave brake cylinders or seized brake shoes.
Usually you only find out about this problem on a brake test unit or
by doing an emergency stop.
But no matter what happened you should always replace the complete
system. Both wheel brake cylinders, the brake shoes and the plastic
covers should be renewed.
To get to the rear brake the brake drums must be taken off. After
taking off the rear wheel take out the plastic cap covering the wheel
bearing. If nobody has worked on the rear brakes so far you'll find an
aluminum cap pressed in instead of a plastic one. This cannot be
removed without destroying it. Just lever it out using a medium size
screwdriver. The new reusable plastic cap is quite inexpensive.. The
new reusable plastic cap is quite inexpensive. In Europe you will see
quite often some adventurous constructions to save a few dollars!
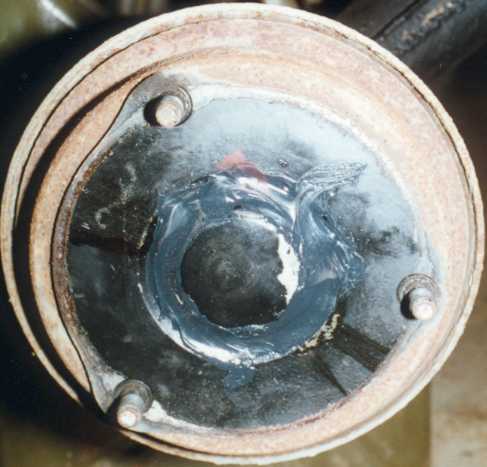
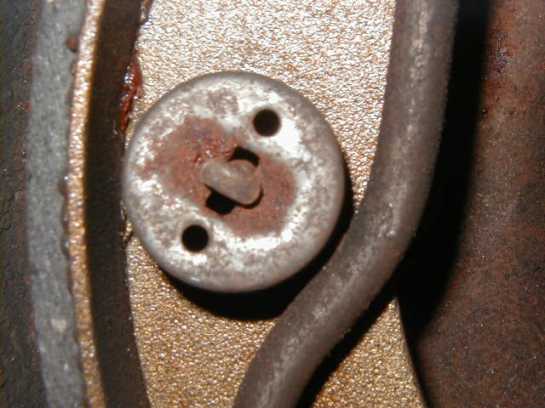
Picture 1 Bungle
work on the brakes
In this
case the forced out and deformed cap was simply glued to the brake
drum with silicone cement! Sometimes you also see the innocent try to
straighten out the cap. This of course will not work. The cap will
ever sit tight. In the consequence sand and dirt gets into the wheel
bearing. Someone who does such a lousy job I would not have him work
on my brakes!
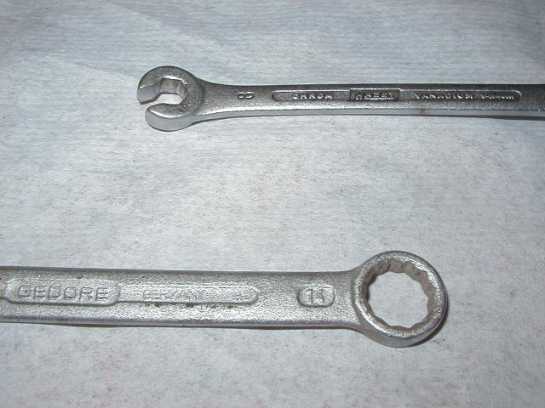
When the cap is removed you'll see the wheel bearing. The inner ring
is hold in place by a 44 mm nut. To get it out you need a socket size
44 mm. If it does not fit in you have to grind it down on the outside
until it's slim enough (62 mm in diameter).
To get the nut out, first you have to push back the locking piece of
the nut. To loosen the nut I use a long extension (of about 1.5 m or 5
feet) on which I step with all my weight (yes, it must be very
tight!). When the nut is taken out you can pull out the brake drum
including the wheel bearing. Usually this is not so easy as the
bearing sits very tight on the axle. But please do not use one of
those pullers - this destroys more than it helps!
An old 2CV rim can easily be converted into a perfect puller: A 12 mm
bolt fits easily through the little square hole in the middle of the
rim. To make a special tool just weld a M 12 nut to the inside of the
rim under the hole, put the rim onto the brake drum with the wheel
nuts and wind a 12 mm bolt (about 150 mm or 6" long) into the nut
from the outside. This will remove the brake drum from the axle
without any damage. Should the inner seal still sit on the axle just
take it of, clean it and put it back into the brake drum over the
bearing. A new seal cannot hurt but is mostly not needed. 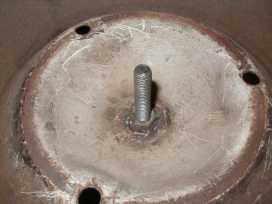 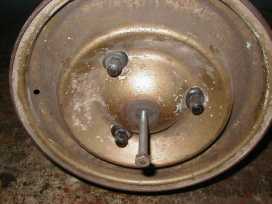
Picture 2 Tool
to pull off the drum
To get
the drum off easily, the 2 cam nuts behind the base plate should be
moved towards the axle. This means the brake shoes should move away
from the drum. This would be nice but mostly you'll not be able to
move them. Instead of trying hard to move them and do some damage to
the nuts better just pull off the drum. This will bend the brake shoes
but since they will be changed anyway this does not count. How to
handle the cam nuts: see below. 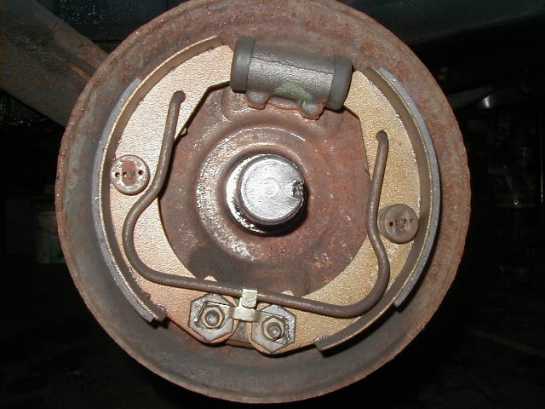
Picture 3 Inside
the rear drum brakes
Before
you start to take out the brake shoes, take out the spring first. This
spring is just a U-shaped big steel wire between the brake shoes. Just
pull the upper ends out of the brake shoes and the lower end out of
the locking plate. Now you need to push down the locking plates over
the cam nuts. This can easily be done with a small and not sharp
chisel. When the locking plate lies flat it can be taken out after
undoing its M7 nuts. Before you take out the brake shoes check their
condition. If the shoes are worn out parallel the lower cams have been
in the correct position. If the nuts have not been turned I mark their
position with a center punch. With this mark I can easily put the cams
back into the correct position later (make sure not to mix the nuts!).
This is not the correct method to do but mostly it works very well.
Otherwise the brake shoes must be centered after the change. You can
easily build yourself a proper centering tool. This will be described
later.
To take out the brake shoes you have to take out the holder in the
middle of the shoe. This holder is a pin going through the rear plate
and it's hold onto the shoe by a spring and a metal cap. To take it
out, hold the pin on the rear of the plate. Then push the cap down
against the spring and turn it 90°.
Picture 4 Holder
on the brake shoe
If the
brake shoes are not seized in they can be taken out now. But mostly
they are rusted to the rear plate. In this case the cams have to be
loosened first. Best is to turn them with a socket size 21 or 22mm
using some WD-40. When it turns you can take off the brake shoe by
continuously turning the cam and adding some WD-40.
Before you can put in the new brake shoes and wheel brake cylinder
the mounting plate must be cleaned from all rust under the lower cams.
Mostly the old shoes were rusted badly to the plate. To make sure the
new shoes will not be stopped from moving by this rust the plate must
be rust free in this area.
Also the upper cams must be able to move. Mostly they are also seized
in their guides. Be careful not to break them off! I use a special
flat 14 mm ring spanner. Do not use a normal offset ring spanner! With
this tool you will slide off the flat cam nuts and destroy their edges
what makes it impossible to adjust the brakes later! So better use a
flat tool.
Seized in cam nuts must be made moving again carefully. If it's no
possible to move it from the outside use a burner. When the nut is
heated up the rust will break. Now you can move it using some WD-40.
Should this not work out your last chance is to use some big groove
joint pliers to grab the cam on the inside and turn it. As soon as it
starts moving use WD-40 and keep on turning it to break the rust until
you're able to turn it from the outside later on. To prepare for the
mounting of the brake shoes the cam should be positioned that their
wider part is pointing to the axle at the inside.
Take the lower cam nuts carefully out of the brake shoes. This works
best if you turn the nuts while using some WD-40. After the cam nut is
removed it needs to be cleaned properly from all rust on all sides
that will later touch the rear plate or the brake shoe.
Now it's time to change the wheel brake cylinder using a 10 mm ring
spanner. Undo both bolts. After the wheel brake cylinder is loose the
brake line has to come out. Always use a proper 8 mm brake line
spanner! Usually the brake lines are seized into the brake cylinder.
If you use a normal 8 mm spanner you'll squeeze the nut on the brake
line - and then you'll have a problem!
Picture 5 Tools
for brake line and cam
As soon
as the nut did the first move to open - stop! Do not continue to turn
it. Often the nut is seized onto the brake line and the brake line
will shear off when you continue to turn it, creating an even bigger
problem. To change the rear brake line is no fun at all - I know what
I'm talking about! So better hold the nut with the brake line spanner
and turn the brake cylinder instead.
After the brake line came out the nut can carefully be made moving
again using some WD-40.
As soon as the wheel brake cylinder is off the brake fluid starts
leaking slowly. Therefore the new brake cylinder should be ready to be
mounted right away to stop the leakage. Take care to use the correct
brake cylinders! If the 2CV has a LHM brake system the new brake
cylinder must be either painted green or show at least a green mark
somewhere.
After the new wheel brake cylinder is connected to the brake line it
can be fixed at the plate with it's 2 bolts. Then tighten the brake
line and check the bolts.
To assemble the brake shoes put the lower cam in into the brake shoe
first. The meeting parts should be treated with a small amount of
copper grease as well as those parts of the brake shoe that will meet
the plate. But be careful: Brakes and copper grease do not match! Only
use a little amount of grease that there will never be a chance to get
some of that grease onto the brakes or the drum when they run hot!!!
Use only a little bit to prevent the parts to rust again. This will
also help you to disassemble the brakes next time.
Now bring the brake shoes into the correct position and secure them
with the nut on the bottom. Now put the holder back into the middle of
the brake shoe: Stick the pin through the rear of the plate and the
shoe and hold it from behind while pushing and turning the cap against
the spring to lock it in.
When both brake shoes are done put back in the U-shaped spring.
The next step is to center the brake shoes. This is needed to get
them parallel to the brake drum to get an even contact to the drum and
therefore an even braking of the car. So first tighten the brake shoes
at the lower cam. The upper cam should still be pointing towards the
axle; the lower cam also needs to point inwards. Now put on the brake
drum again. The axle end must be nicely clean not to damage the wheel
bearing. To center the shoes turn one cam as far as the shoe just
touches the drum. Now turn it back so it just does not touch the drum
any more. This must be done to both sides.
Now take the brake drum off again. To adjust the lower cam, open the
nut far enough to turn the cam. To get the shoes parallel you'll need
a tool. This is mainly a compass to check the parallel distance from
the axle to the shoes.
I built such a tool from an old nut fitting onto the axle. To one of
its flat sides I welded a metal pin that holds an adjustable pin. This
2nd pin moved to the right distance and is hold to the 1st pin by a
small bolt. 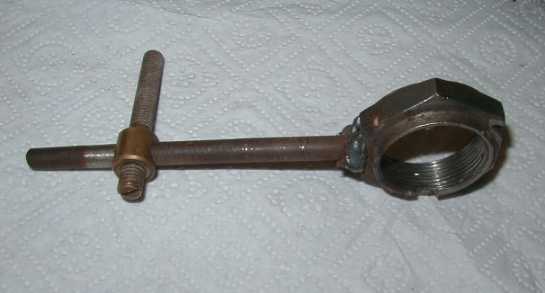
Picture 6 Simple
centering tool
To
center the brakes the distance at the upper part of the brake shoe
must be adjusted so it just does not touch the drum (as described
before). Now put the center tool onto the axle and adjust the pin to
meet the already adjusted upper part of the shoe. Now turn the tool so
the pin moves down along the shoe. Now adjust the distance of the shoe
to be parallel with the pin using the lower cam. This must be done to
both shoes but do not change the adjustment of the pin for the 2nd
shoe as this represents diameter of the brake drum. If you can turn
the tool 360° and always having the same distance the brake shoes
are centered. 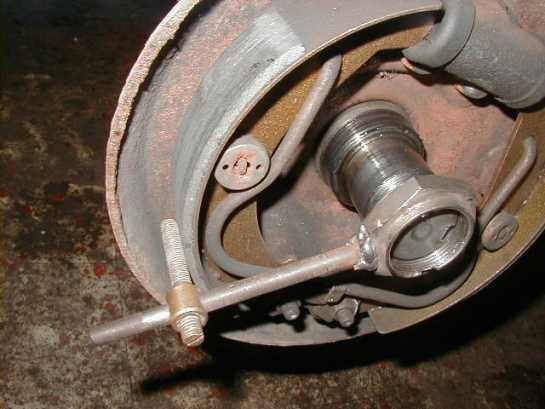
Picture 7
Centering the brake shoes
Finally
tighten and secure the nuts of the lower cam. Put on the brake drum
and make sure the axle end is completely clean. Do not try to pull the
drum onto the axle by using the nut. This easily destroys the fine
thread on the axle end what destroys the complete suspension arm. So
better use a hammer to push the drum in until there is enough thread
to screw the nut on completely. When installing the brake drum make
sure to put it on straight.
When the drum is back in place tighten the nut very hard! At last
push a section of the locking ring into the gap on the axle end.
When changing the wheel brake cylinders air will get into the system.
So you need to bleed the brake system. This job normally requires the
help of a second person and takes quite a while. I have a trick doing
this with the help of my old friend Isaac Newton. I simply let the
gravity work for me by opening the bleeder valve. Now the brake fluid
runs down from the higher reservoir into the wheel brake cylinder.
Since the brake line has a very small inner diameter and the viscosity
of the brake fluid is relatively high no air gets into the system. You
only have to wait until the brake fluid starts to come out of the
bleeder valve. This has proved to work very well since years already.
But only open one valve at a time never open both sides together.
I always bleed the brakes while I'm preparing the brake shoes and
lower cams using a little cleaning paper to catch the drops of the
brake fluid. During this time nothing happens to the brake system so
Newton can do his job. |